The Git ecosystem is pretty amazing and I’m grateful that it exists. In this tutorial, I’ll be showing you how I added the Git commit hash to the bottom of the website. This is the first step on enabling versioning history on the site and we’ll build the MVP using the Cloudflare Workers “workers.dev” free tier.
This tutorial consists of:
- Generating a personal access token on GitHub
- Writing the serverless Cloudflare worker
- Writing a React component to fetch the Cloudflare worker
- Bonus Rewriting the React component using React hooks
Step 1: Generating a personal access token on GitHub
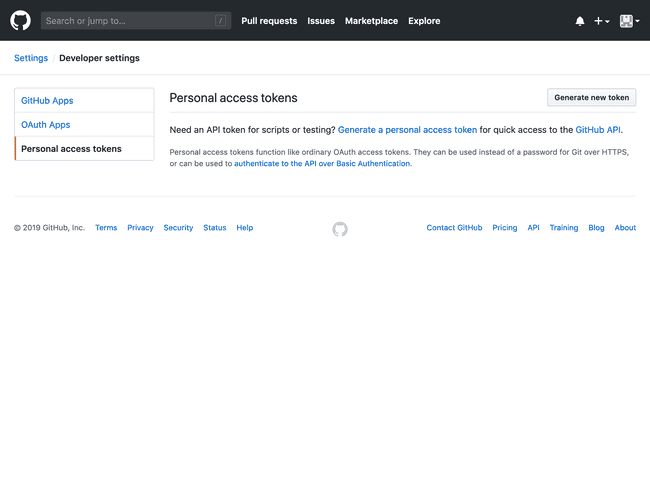
Head on over to https://github.com/settings/tokens to create your personal access token. This will be needed to increase our rate limit from the default access of 60 requests an hour per IP address to the authenticated access which allows 5,000 requests per hour.
Once you have signed in, click on Generate new token and give it a name. You won’t need to enable any scopes if your repository is publically available on GitHub. If it isn’t, select the repo:status scope.
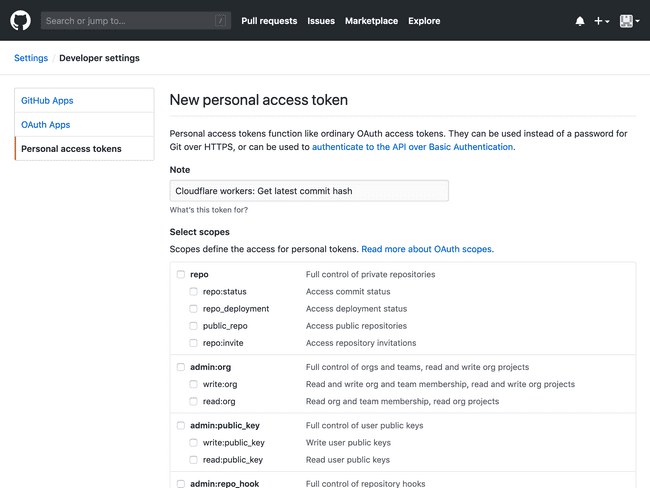
Scroll down and select Generate token.
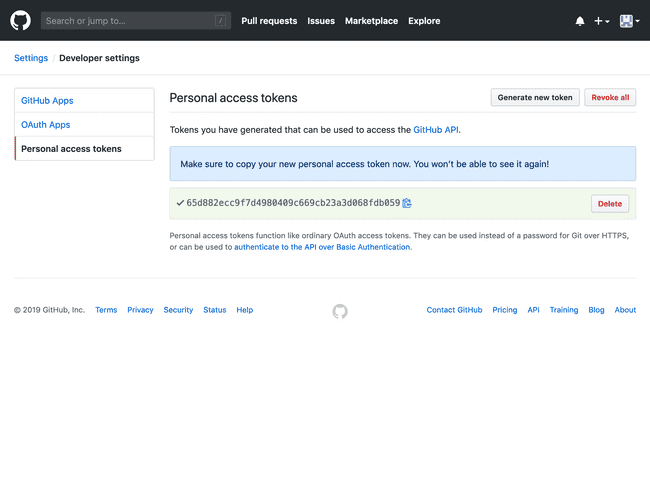
Copy this value as we’ll need it in the next section.
Step 2: Writing the serverless Cloudflare worker
In another tab, open up workers.dev and log in. You’ll be presented with a start page.
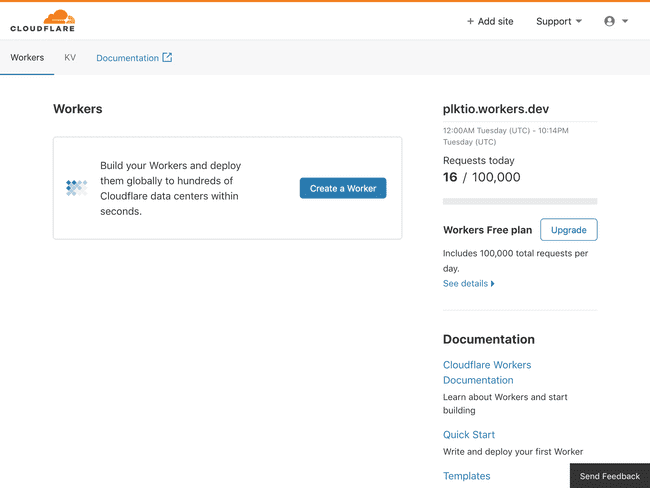
Click Create a Worker. Now you will see a very simple (and working!) Cloudflare worker definition.
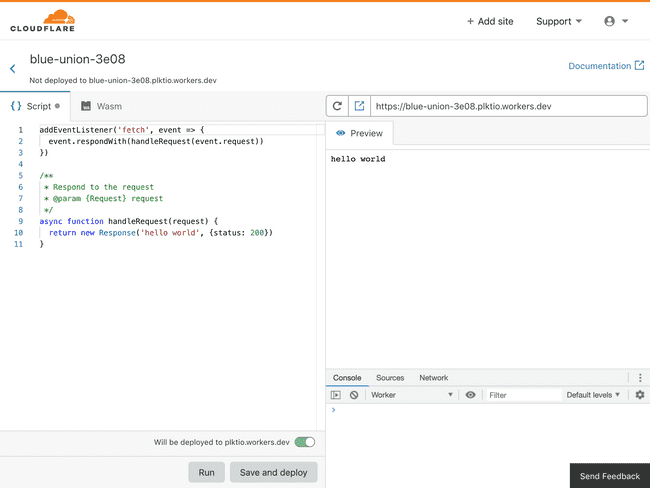
You can test the template by clicking Save and deploy and then issuing curl <worker address> in a terminal or opening the address in a web browser.
$ curl blue-union-3e08.plktio.workers.dev

hello world
There are a couple things we need to remember before writing a line of code:
- From the GitHub API docs, we’ll need to specify a user-agent when querying the API.
- The API in question (also available in the docs) is
https://api.github.com/repos/xocite/plktio/branches/master. Replacexocitewith your username andplktiowith your repo name.
We’ll write one extra function to fetch the hash from the GitHub server and then update the handle request function to return commit.
Let’s declare the personal access token and GitHub API endpoint as constants we can access throughout the script. Remember to replace the endpoint and token with your own.
const GITHUB_URL_ENDPOINT = 'https://api.github.com/repos/xocite/plktio/branches/master'
const GITHUB_PERSONAL_ACCESS_TOKEN = '65d882ecc9f7d4980409c669cb23a3d068fdb059'
Next, we’ll write the function to get the GitHub commit hash, keeping in mind that a user agent is required per the GitHub API docs.
Here’s the first version of the function.
async function fetchGitHub(url) {
const init = {
method: 'GET',
headers: {
'User-Agent': 'Cloudflare/workers/xocite',
}
}
const response = await fetch(url, init)
const result = await response.json()
const hash = result.commit.sha
return hash
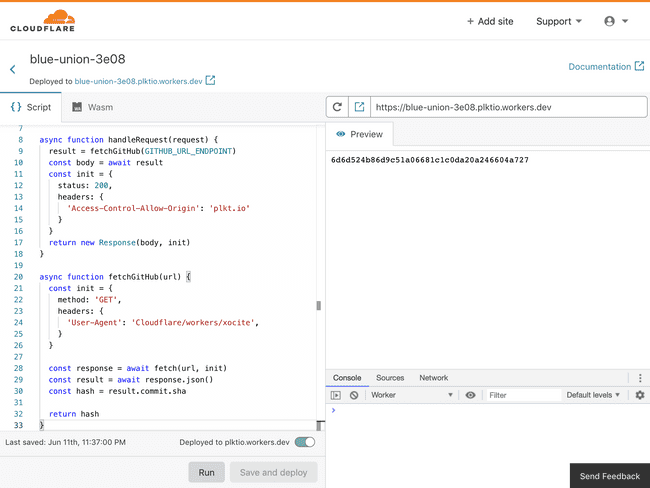
}Next, we’ll update the handleRequest(request) function to call our fetch function and respond with the commit hash. Keep in mind that we’ll also need to restrict access to the server calling this function — so make sure you replace plkt.io/ with your domain name. If you’re running into errors calling this from the terminal, change the domain name to '*' until you have the function working.
async function handleRequest(request) {
  result = fetchGitHub(GITHUB_URL_ENDPOINT)

  const body = await result
  const init = {
    status: 200,
    headers: {
      'Access-Control-Allow-Origin': 'plkt.io/'
    }
  }
  return new Response(body, init)
}
To finish the function, we’ll add our GitHub authorisation token to the fetch request to increase our rate limit. Your final function should look something like this.
const GITHUB_URL_ENDPOINT = 'https://api.github.com/repos/xocite/plktio/branches/master'
const GITHUB_PERSONAL_ACCESS_TOKEN ='65d882ecc9f7d4980409c669cb23a3d068fdb059'

addEventListener('fetch', async event => {
  event.respondWith(handleRequest(event.request))
})

async function handleRequest(request) {
  result = fetchGitHub(GITHUB_URL_ENDPOINT)

  const body = await result
  const init = {
    status: 200,
    headers: {
      'Access-Control-Allow-Origin': 'plkt.io/'
    }
  }
  return new Response(body, init)
}

async function fetchGitHub(url) {
  const init = {
    method: 'GET',
    headers: {
      'User-Agent': 'Cloudflare/workers/xocite',
      'Authorization': "token " + GITHUB_PERSONAL_ACCESS_TOKEN,
    }
  }

  const response = await fetch(url, init)
  const result = await response.json()
  const hash = result.commit.sha

  return hash
Make sure you see the hash on the right side when you click “Run”.
Step 3: Writing a React component to fetch the Cloudflare worker
Finally, we’ll update the code for the website to call the worker. For this tutorial, we’ll be building this into my existing codebase — which means we’ll be using React components with GatsbyJS.
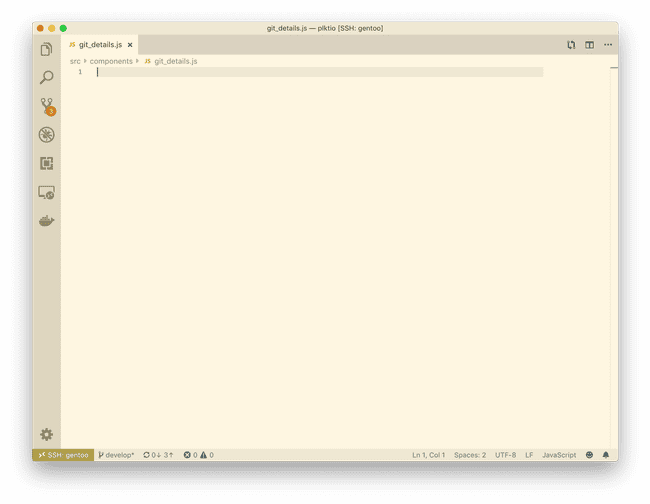
Open up VSCode in the folder for your website and create a new component entitled ‘git_details.js’ under ‘src/components’.
We’ll need to keep the following in mind:
- We’re building a React component class that performs network activity, so we’ll need to keep the network activity inside the
componentDidMount()function. More details on the React documentation. - We don’t want the hash to unexpectantly appear on the page so we’ll set a default value in the constructor.
The final class looks something like this:
import React, { Component } from "react"

class GitDetails extends Component {
  constructor(props) {
    super(props)

    this.state = { data: "Fetching hash...", }
  }

  componentDidMount() {
    fetch(
      'https://blue-union-3e08.plktio.workers.dev/',
      { method: 'GET' }
    )
    .then(response => response.text())
    .then(data => this.setState({ data }))
  }

  render() {
    const { data } = this.state
    return (
      <div>{data}</div>
    )
  }
}

export default GitDetails
Next, we can import that in our layout.js file

Now, running this locally, we can see the result working.

That’s it for including the Git commit hash on your deployment using serverless functions.
Step 4: Rewriting the React component using React hooks
We can make our Cloudflare worker even simpler by using React hooks. They allow you to write simple functions instead of using classes. Additionally, managing the state of the component is easier than using classes. You can read more about them on the React blog.
In our original class, we set the state in the constructor. With React hooks, we’ll set the state in the beginning of the function instead.
import React, { useState } from "react"
const GitDetails = () => {
  const initialState = "Fetching hash..."
  const [result, setResult] = useState(initialState)
}
Next, we’ll move the contents of the componentDidMount() method into the useEffect() method hook. This new method combines componentDidMount(), componentDidUpdate(), and componentDidUnmount(). This hooks lets us tell React to run it after we complete the render.
import React, { useState, useEffect } from "react"
useEffect(() => {
  fetch(
    'https://blue-union-3e08.plktio.workers.dev/',
    { method: 'GET' }
  )
  .then(response => response.text())
  .then(data => setResult(data))
})
Because useEffect will run after componentDidUpdate — potentially resulting in multiple fetches — we will tell it to skip re-rendering the effect if a component value changes.
// Before
useEffect(() => {}))

// After
useEffect(() => {}, [])
Finally, because we’re writing a function and not a class we will move the contents of the render call inside the return call.
return (
  <div>
    {result}
  </div>
)
Great. Now our final React hook function looks like this.
import React, { Component, useState, useEffect } from "react"

const GitDetails = () => {
  const initialState = "Fetching hash..."
  const [result, setResult] = useState(initialState)

  useEffect(() => {
    fetch(
      'https://blue-union-3e08.plktio.workers.dev/',
      { method: 'GET' }
    )
    .then(response => response.text())
    .then(data => setResult(data))
  }, [])

  return (
    <div>
      {result}
    </div>
  )
}
export default GitDetails
React hooks are easy to use and make it easier to debug your code so I encourage you to use them when writing new code.
Recap
To recap:
- We retrieved our personal access token from GitHub because authenticated users have an increased rate limit of 5,000 requests an hour.
- We wrote a basic Cloudflare worker that receives a request, contacts GitHub via the API, and responds with a commit hash.
- We wrote a React component class that calls our Cloudflare worker and displays the result in the page.
- Bonus We rewrote the React component class into a simpler function using React hooks.
Thank you for reading this tutorial all the way to the end. I hope it was helpful to understand the basics of connecting serverless functions with your static websites!